This article gives an overview of the Custom Reports feature and provides the list of Pre-Defined Global Variables and Drop Down Filtering Options that can be used.
Overview
The Custom Reports feature allows users to create their own custom reports inside kwiklook. This feature includes:
A completely customisable report writer with tons of options.
Create reports on most database tables in kwiklook.
Importing and Exporting Custom Reports: Request specific reports from the kwiklook Support Team and import them straight into your kwiklook installation without an upgrade.
Pre-defined variables such as date and time.
A large selection of drop down options for choosing specific record and parameter filters.
Specify your own fonts, font sizes and colours.
Print to the printer, PDF, Word, Excel or Email.
The Custom Reports feature can be found in the top menu bar inside kwiklook by clicking ‘Reporting > Custom Reports’.
Please note: To print reports to Word or Excel, Microsoft 365 must be installed on the PC that the report is being printed on.
Please note: Custom Reports is available in kwiklook v6.8 and above.
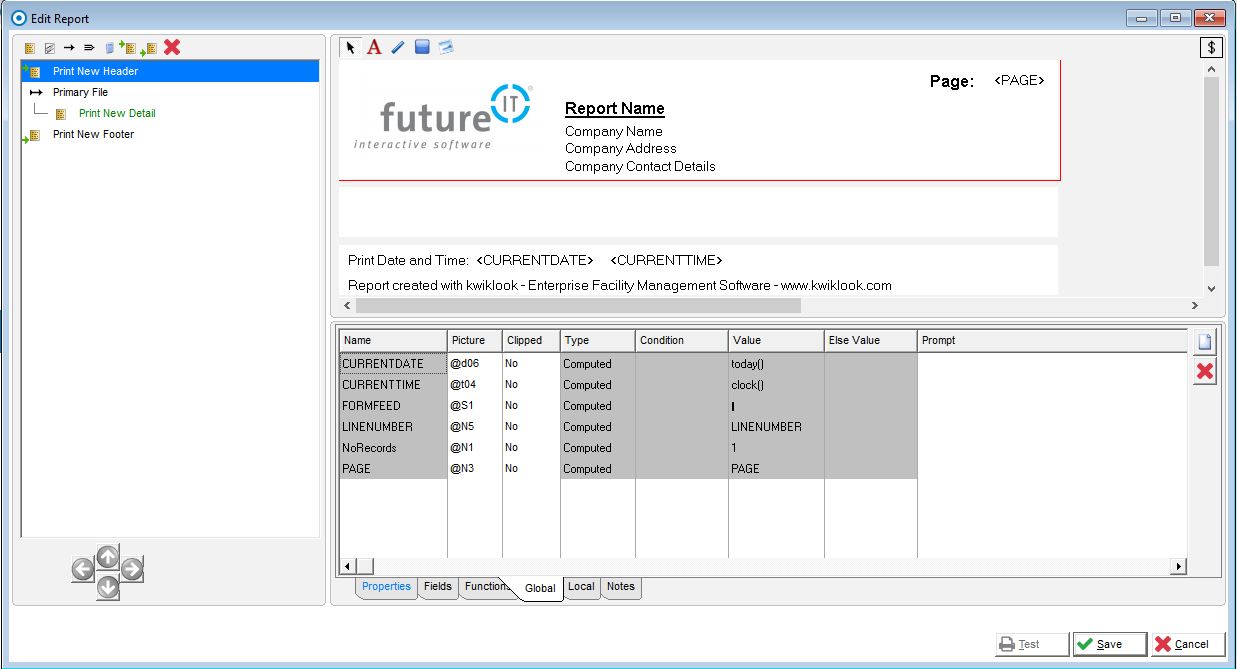
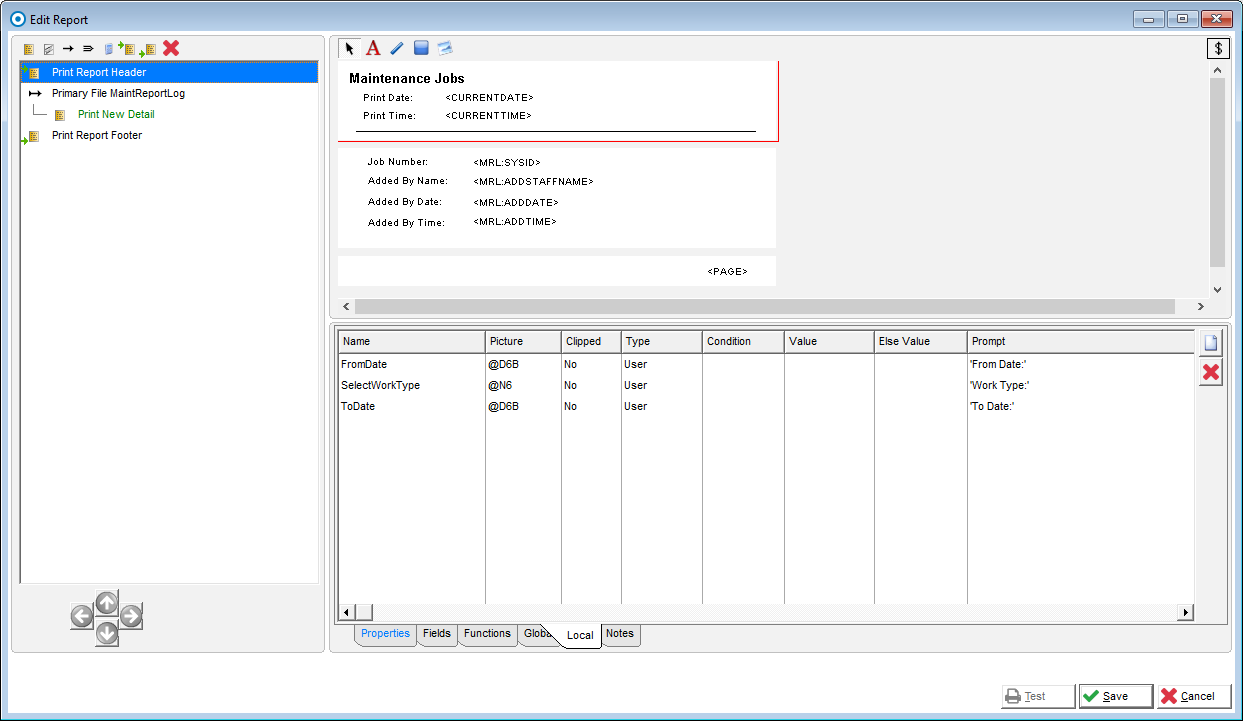
The Edit Report Window
The ‘Edit Report’ window is where the custom report is created and designed:
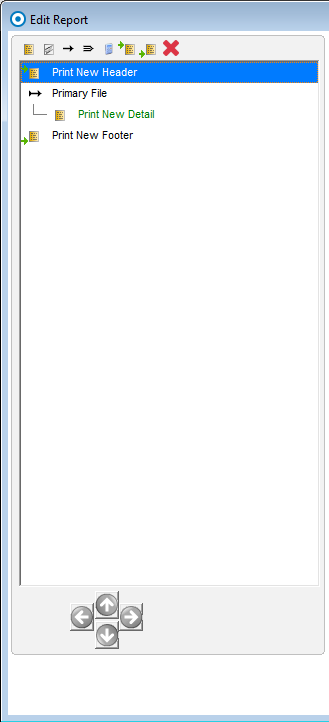
The Report Structure List pane: This pane (on the left of the window) shows the structure of the report and is used to add headers, footers, detail bands, lookups, secondary source loops and calculations into the report:
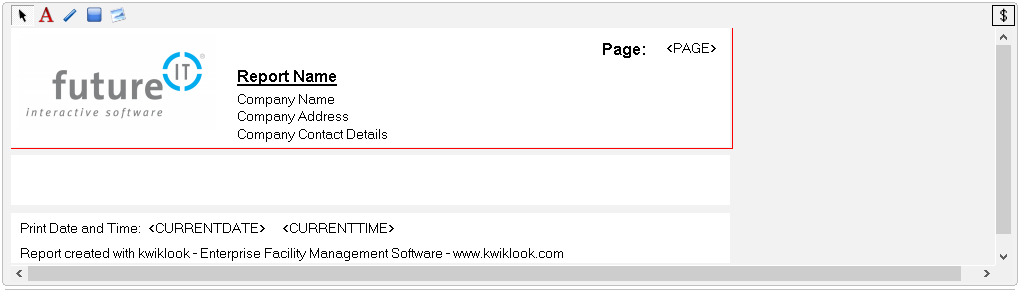
The Graphic Band Editor pane: This pane (on the top right of the window) shows the header, footer and detail bands that are added via the ‘Report Structure List’ pane, and is used to design the fields on the report:
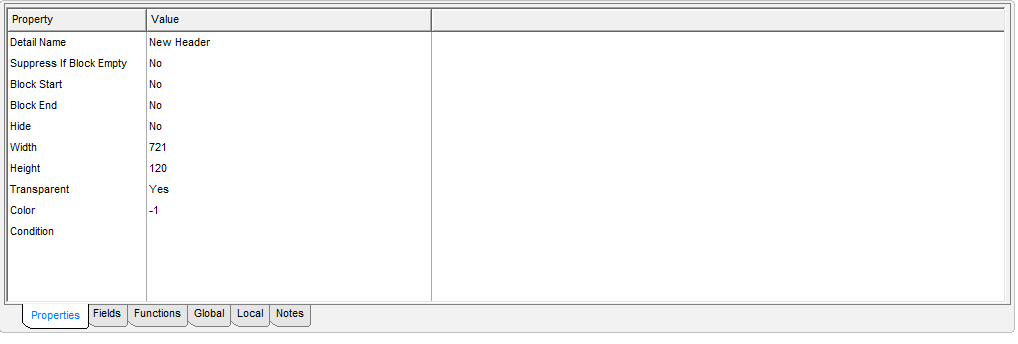
The Property Editor pane: This pane (on the bottom right of the window) allows you to edit various properties belonging to the currently selected item in the Report Structure List. If a control is selected in the Graphic Band Editor, it allows you to edit the properties for that control:
The Report Preview Window
The ‘Report Preview’ window allows previewing the report before printing to a printer, file or emailing. This window also allows reviewing each page of the report and the ability to include or remove certain pages from the report:
The ‘Navigation Bar’ on the top left of the ‘Report Preview’ window includes buttons for navigating the pages of the report, zoom controls and a checkbox for including or excluding the currently viewed page from the report:
The ‘Output’ bar on the bottom left of the ‘Report Preview’ window includes buttons for choosing where to print this report to. It also includes a file path and name field that allows choosing where the report is printed to on the PC and setting the file name:
The ‘Print/Close’ buttons on the bottom right of the ‘Report Preview’ window allows choosing whether to print the report or close the window:
Pre-Defined Global Variables
Custom Reports comes with certain pre-defined global variables. These variables can be used on reports to display information, such as the current date, current time and page number. The list of global variables are:
CURRENTDATE: Today’s date.
CURRENTTIME: Today’s time.
FORMFEED: Immediately starts a new page. For text reports it starts a new page immediately and prints the remainder of the band its on on the next page. For graphic reports, it finishes printing the current band before starting a new page.
LINENUMBER: Only for Excel reports. This will be replaced by the current line number on the page.
NoRecords: Used to print a new band when no records are found.
PAGE: The page number. Best used in header and footer bands.
Drop Down Filtering Options
Custom Reports comes with the ability to add filters so the same report can be used to produce different results. Examples of filters are:
A date range (from date and to date).
An Incident Report Category or Subcategory.
A specific Location.
A specific Staff Member or Department.
The list of available drop down filters are:
Admin:
All modules related:
SelectReportingGroup: Select a specific Reporting Group.
Cost related:
SelectAccount: Select a specific Cost Account.
SelectCostCentre: Select a specific Cost Centre.
Location related:
SelectRegion: Select a specific Region.
SelectSite: Select a specific Site.
SelectAreaLevel: Select a specific Area/Level.
SelectLocation: Select a specific Location.
SelectLocationType: Select a specific Location Type.
Staff related:
SelectStaff: Select a specific Staff Member.
SelectDepartment: Select a specific Staff Department.
SelectPosition: Select a specific Staff Position.
Service Provider related:
SelectSP: Select a specific Service Provider.
SelectSPS: Select a specific Service Provider Staff Member.
SelectServiceNature: Select a specific Service Provider Nature.
SelectServiceType: Select a specific Service Provider Type.
Communications:
Communications Diary related:
SelectCommsDiary: Select a specific Communications Dairy Entry.
SelectCommsDiaryDesc: Select a specific Communications Diary Description.
Task related:
SelectTask: Select a specific Task.
SelectTaskCategory: Select a specific Task Category.
SelectTaskSchedule: Select a specific Task Schedule.
Incidents:
Incident related:
SelectIncCategory1: Select a specific Incident Category.
SelectIncCategory2: Select a specific Incident Subcategory.
SelectIncCause: Select a specific Incident Subcategory Cause/Method.
Incident Item related:
SelectIncItemCat1: Select a specific Incident Item Category.
SelectIncItemCat2: Select a specific Incident Item Subcategory.
Incident Person related:
SelectIncPerson: Select a specific Incident Person Involved.
SelectIncPersonType: Select a specific Incident Person Involved Type.
Maintenance & Assets:
Asset related:
SelectAsset: Select a specific Asset.
SelectAssetProfile: Select a specific Asset Profile.
SelectServiceProc: Select a specific Asset Service Procedure.
SelectBrand: Select a specific Brand.
SelectModel: Select a specific Model.
SelectAssetCat1: Select a specific Asset Category 1.
SelectAssetCat2: Select a specific Asset Category 2.
SelectAssetCat3: Select a specific Asset Category 3.
SelectAssetCat4: Select a specific Asset Category 4.
Maintenance related:
SelectMaintJob: Select a specific Maintenance Job.
SelectWorkType: Select a specifc Work Type.
SelectWorkSubType: Select a specific Work Subtype.
SelectPMSchedule: Select a specific Planned Maintenance Schedule.
Residents & Properties:
SelectResident: Select a specific Resident.
WHS Compliance:
Credentials related:
SelectOccupation: Select a specific Occupation.
SelectCredProfile: Select a specific Credential Profile.
Courses related:
SelectCourse: Select a specific Course.
Hazard related:
SelectHazard: Select a specific Hazard.
SelectHazardType: Select a specific Hazard Type.
Project related:
SelectProject: Select a specific Project.
SelectProjectType: Select a specific Project Type.