This article describes how to backup kwiklook either via the automatic method using kwiklook Backup or manual method using Microsoft SQL Server Management Studio and WinZip.
Automatic Method:
The kwiklook database and program files can be backed up using the kwiklook Backup app that is installed with kwiklook on the kwiklook master server. The default location of the kwiklook Backup app is in ‘C:\kwiklook Backup’.
Login to the kwiklook master server as an administrator.
The desktop should contain a shortcut to running the kwiklook Backup Administrator app that allows changing the settings of the kwiklook Backup app. Run the kwiklook Backup Administrator app. If the shortcut doesn’t exist then the kwiklook Backup Administrator app can be run from the kwiklook Backup installation folder: ‘C:\kwiklook Backup\kbadmin.exe’.
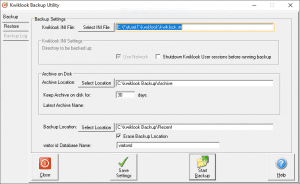
The kwiklook Backup Administrator app should be now open:
Edit the settings of the kwiklook Backup Administrator app to match your kwiklook installation. The default settings are:
kwiklook INI File: C:\FutureIT\kwiklook\kwiklook.ini
Archive on Disk: C:\kwiklook Backup\Archive
This setting is the folder that all backups should be stored in. This could be a local or network folder.
Backup Location: C:\kwiklook Backup\Recent
This setting is the folder that the backup will be built in, before saving to the ‘Archive on Disk’ folder. This should be a local folder.
visitor id Database Name: visitorid
This is the name of the visitor id database that can also be backed up during the backup process.
Click the ‘Save Settings’ button.
The backup can now be run from the kwiklook Backup Administrator app by clicking the ‘Start Backup’ button.
Creating a Windows Scheduled Task to run the kwiklook Backup:
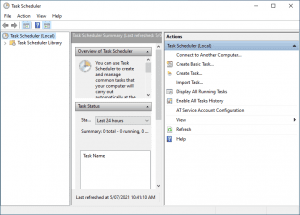
Click the Windows Start Button and type in ‘Task Scheduler’, then open the Task Scheduler.
Click ‘Task Scheduler Library’, then click ‘Create Basic Task’.
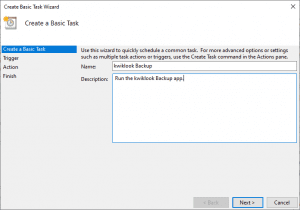
Enter the name and description of the Task, then click ‘Next’:
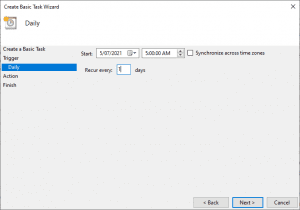
Select the Trigger to use then click ‘Next’. We recommend a daily backup:
Enter the ‘Start’ Date and Time that this Task should run. We recommend a time where kwiklook is not in heavy use:
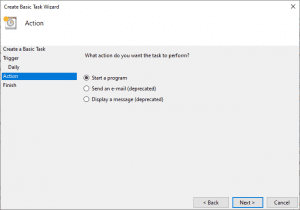
Choose the ‘Start a program’ option and click the ‘Next’ button:
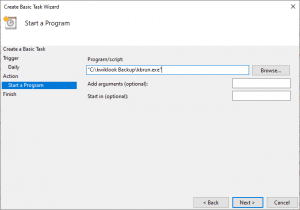
In the ‘Start a program > Program/Script’ option, enter the ‘kbrun.exe’ file location, then click the ‘Next’ button. The default location is: “C:\kwiklook Backup\kbrun.exe”:
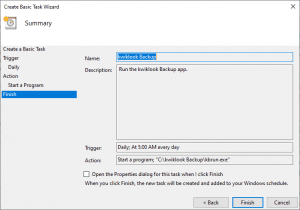
Press the ‘Finish’ button and the Scheduled Task will be created successfully:
Run kwiklook Backup from inside kwiklook:
Coming soon.
Manual Method:
These instructions apply to the default settings that kwiklook is installed with, using Microsoft SQL Server Management Studio 2014 Express and WinZip. If you are unsure of any step please contact the kwiklook Support Team for further advice.
Note: To backup the kwiklook database only, follow steps 1 – 11.
Note: To backup the kwiklook application files only, follow steps 12 – 15.
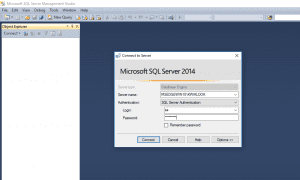
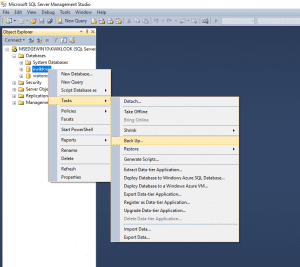
On the SQL Server machine, open ‘SQL Server Management Studio’ by clicking ‘Start > All Programs > Microsoft SQL Server 2014 > SQL Server Management Studio’.
Connect to the SQL Server Instance that the kwiklook database is installed on, usually ‘PCNAME\KWIKLOOK’:
Expand the ‘Databases’ folder by clicking the ‘+’ sign.
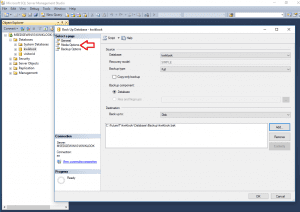
Right click the ‘kwiklook’ database and select ‘Tasks > Back Up…’:
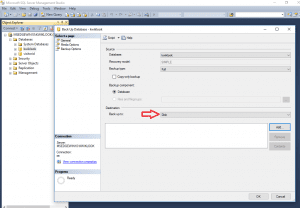
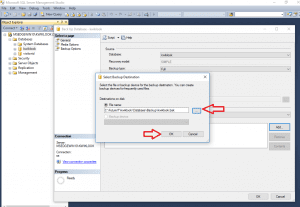
In the ‘Back Up Database’ window, in the ‘Destination’ option, choose ‘Disk’:
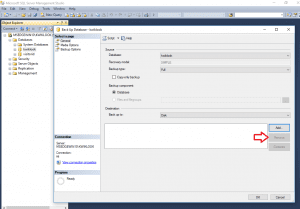
In the ‘Destination’ option, click the ‘Remove’ button to remove any existing file names:
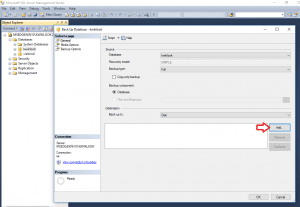
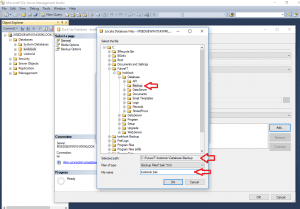
In the ‘Destination’ option, click the ‘Add’ button and choose a location that you want to backup to. Make sure the filename ends with ‘.bak’, i.e. C:\FutureIT\kwiklook\Database\Backup\kwiklook.bak
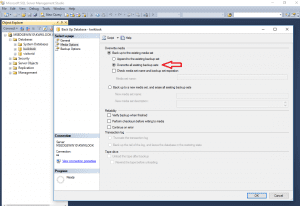
In the left-hand pane, choose the ‘Media Options’ page:
In the ‘Overwrite Media’ option, choose ‘Overwrite all existing backup sets’:
Click the ‘Ok’ button to start the backup.
Once the backup is complete, click the ‘Ok’ button and close down Microsoft SQL Server Management Studio.
Locate the master kwiklook files on the kwiklook master PC. The default location is ‘C:\FutureIT\kwiklook’.
Right click the ‘kwiklook’ folder and choose ‘Send To > Compressed (zipped) folder’.
Once the zipping process is complete, rename the zip file to be more specific, i.e. 20210705kwiklookBackup.zip.
Once the folder has completed being zipped, the zip file is now ready to store in a backup location.
Was this post helpful?
Let us know if you liked the post. That’s the only way we can improve.